Logging in Ruby

Logging in Ruby: (Almost) Everything You Need to Know

Like backups, logging is one of those topics that seems unnecessary until something goes wrong! It's very frustrating to fix a bug that's only reproducible in production without having any logs to help you debug it. This post covers the basics of logging in Ruby and adds logging to our no-rails app.

10 min read
P.S. One of the friends (subscribers) of Akshay’s Blog, the UK-based Ruby and Rails development agency mmtm.io (pronounced as 'momentum', btw) is looking for a new Rails developer to join their team.

In addition to Rails, they use Hotwire + Stimulus + Tailwind, which in my opinion is the best tech stack to build web applications in 2023. Check out their job opening for the full-stack developer role (it's remote!!), and if you think you’re a suitable candidate, get in touch with them.

Obligatory disclaimer: This is not a paid sponsorship or a recruiting pitch. With the tight hiring market and extreme competition from all the FAANG developers who were laid off recently (check out this HN thread), so many developers are having trouble finding new jobs.

Every day, I keep getting emails and LinkedIn DMs from devs struggling to find jobs and having no luck for months on end, and it's heartbreaking. I just wanted to do my part and share any interesting job opportunities that I come across with our awesome little community.

Momentum really looks like a fun company (and team) to work with, and I hope you land the job. Good luck!

Update: This post got to the front-page of the Hackernews for a whole day, and a bunch of interesting discussion followed. Check it out!


Building and deploying an application is only the beginning. You have to maintain it. When something goes wrong, how can you figure out what's the problem?

It's very easy to find and fix bugs when you're in the development mode. You have the terminal open with the Rails logs scrolling by you. If something goes wrong, just replay it, find the error in the terminal, and fix it.

But in production (or even staging), you can't just open the terminal and search the endless terminal output. Past a limit, it won't even let you scroll up. You need a better solution. You need to redirect the log streams to a different destination than the standard output to view or archive them, e.g. log files or a 3rd party service. You need logs that can be quickly searched and organized.

That's why structured logging is so important in troubleshooting errors. Often, you don't just need the exact error, but the trail of events that led to that error. Detailed logs provide the additional context needed to quickly identify and fix an issue.

You must have seen those postmortems from companies on their downtimes. Often, a detailed log trail provides the much-needed visibility into the sequence of events that happened leading to the issue.

Logging is important because of the visibility it brings into your application. There are many kinds of logs, here're a few I can think of off the top of my head.

  1. Web Server Logs: Information about the incoming HTTP request, where did it come from, response (success or failure), request processing time, etc.
  2. API Logs: Who made the call, what were the input params, how long did it take, etc.
  3. Application Logs: Tracking various events in the application, e.g. user orders, registrations, unsubscribes, etc.

That's why, in the sixth article in the series on building a web application in Ruby without Rails, we'll take a break from adding new features and implement logging so we have a better chance to find and fix errors, when they inevitably pop up in future.

Even if you aren't following this series (which you should), the first part of the article only focuses on Ruby's logging capabilities, so everything should still make sense. We'll add logging to our no-rails application in the second part of the post.

Normally we can output informational messages using Ruby's puts function. For example, to print a message when the request hits the index action, we could simply print a message as follows.

class ArticlesController < ApplicationController
  def index
    puts 'displaying all articles'
    @title = 'All Articles'
  end
end

It outputs the message which by default prints to the standard output, that is, the terminal. However, in production, the log messages will be lost, as we're not saving them anywhere. Hence, we need a flexible solution that can customize the log endpoints based on the environment.

Logging in Ruby

To get started with logging, we'll use Ruby's logger standard library. Specifically, we'll use the Logger class. From the docs,

Class Logger provides a simple but sophisticated logging utility that you can use to create one or more event logs for your program. Each such log contains a chronological sequence of entries that provides a record of the program’s activities.

Let's create a Ruby script called main.rb with the following code in it.

require 'logger'

logger = Logger.new($stdout)

logger.info 'user logged in'
logger.error 'could not connect to the database'

After requiring the logger library, we create a new instance of the Logger class, passing the $stdout global variable, which represents the current standard output.

By default, STDOUT (the standard output / console) is the default value for the $stdout global variable, so the above code simply logs the messages to the console.

Let's verify by running the program.

> ruby main.rb

I, [2023-07-29T15:04:20.155996 #36605]  INFO -- : user logged in
E, [2023-07-29T15:04:20.156055 #36605] ERROR -- : could not connect to the database

As you can see, the logger printed the messages to the console, but it just didn't print the messages, but also additional information like the timestamp and the type (or severity level) of the message (INFO or ERROR). This lets you easily search the messages.

Instead of logging to the terminal, you may want to log it to a log file, which is a text file containing the log messages. The benefit being, you could store and archive this file for later usage or a better visibility into your application.

Let's see how you could write logs to a log file.
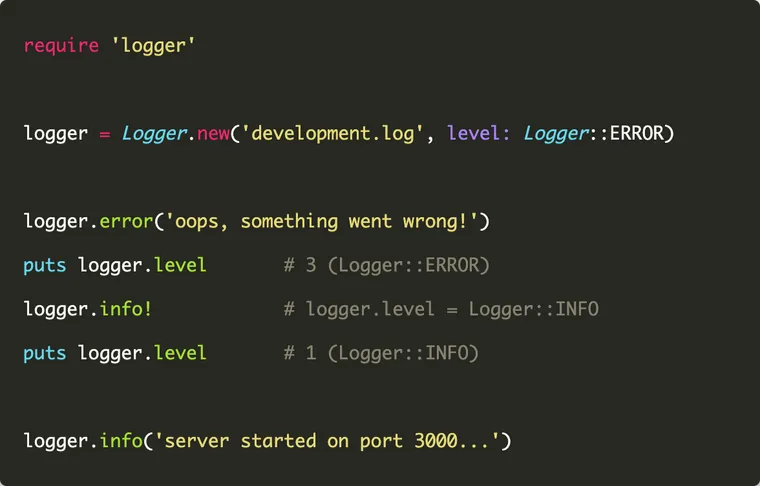
Logging to a Log File

Let's inspect another benefit of the Logger class, the ability to log to a separate log file. Modify our script so it looks like this:

require 'logger'

logger = Logger.new('development.log')

logger.info 'user logged in'
logger.error 'could not connect to the database'

Note that instead of using $stdout, we're now passing the name of the log file,  development.log. This tells the logger to log all messages to this file instead of the terminal. If the file doesn't exist, it will create one. Let's verify by running the script.

> ruby main.rb

No logs were printed to the terminal. However, it should've created a new file called development.log in the current directory, with the following content.

# Logfile created on 2023-07-29 15:09:08 -0700 by logger.rb/v1.5.3
I, [2023-07-29T15:09:08.616862 #36690]  INFO -- : user logged in
E, [2023-07-29T15:09:08.616903 #36690] ERROR -- : could not connect to the database

If you run the program again, the logger will append the new log messages to the existing file. So you retain all the previous logs, which is pretty handy in production environment.

Log Levels

A log level is an integer representing the importance or severity of a log event. The higher the level, the more severe the event.

It's recommended to specify a log level whenever you create a log. Primarily, it's to indicate how serious or important the log message is. It also helps with filtering and finding specific logs from the log files.

In addition to info and error, the logger provides following levels of logging.

logger.debug('Maximal debugging info') # log level: 0
logger.info('Non-error information')   # log level: 1
logger.warn('Non-error warning')       # log level: 2
logger.error('Non-fatal error')        # log level: 3
logger.fatal('Fatal error')            # log level: 4
logger.unknown('Most severe')          # log level: 5

Behind the scenes, these shorthand methods use logging levels like Logger::DEBUG, Logger::WARN, etc.

When you call any of these methods, the entry may or may not be written to the log, depending on the entry’s severity and on the log level. The logger only writes logs with severity higher or equal to its current log level.

By default, when you create a new Logger instance, it's set to the lowest level of logging, which is Logger::DEBUG. It means that all log messages above this log level will be written to the logs.

logger = Logger.new('development.log')

puts logger.level  # 0

However, you can set the level when you create the logger.

logger = Logger.new('development.log', level: Logger::ERROR)

Now only error, fatal, and unknown levels of logs will be written to the log file.

require 'logger'

logger = Logger.new('development.log', level: Logger::ERROR)

puts logger.level  # 3

logger.info 'this is not added to the logs'
logger.error 'could not connect to the database'
logger.unknown 'something went wrong'

If you already have a logger instance, you can directly re-assign its level, or use one of the shorthand methods:

require 'logger'

logger = Logger.new('development.log', level: Logger::ERROR)
puts logger.level  # 3

logger.level = Logger::WARN  # re-assign log level
puts logger.level  # 2

logger.fatal!                # shorthand
puts logger.level  # 4

# Output
3
2
4

To check the current log level, use these methods:

logger.level = Logger::ERROR
logger.debug? # => false
logger.info?  # => false
logger.warn?  # => false
logger.error? # => true
logger.fatal? # => true

Now you can log as much as you want, but there're two levels I can think of where logs are important.

  • Informational messages for debugging or auditing, like user 'ak' subscribed or new product added to inventory, etc.
  • When something goes wrong, log the error e.g. no user found in database

So most of the time, I'll stick to either info or error logs. In rare cases, when I need to crash and exit, I'll resort to fatal level.

Log File Rotation

If you're worried about the log files growing infinitely in size, you can implmement log file rotation. It keeps the log files to a manageable size, and you can either archive or even delete the previous log files, depending on the criticality of your application.

Retention is often a legal issue, as logs can often contain personal information that's regulated.

Ruby's logger supports both size-based rotation as well as periodic rotation. Check out the docs to learn more.


Alright, that's enough information about the logging in Ruby. Let's put the Logger class to good use in our no-rails web application written in Ruby.

If you haven't been following the no-rails series, the rest of the article might not make much sense. So I suggest reading from the first article:
Let’s Build a Web Application in Ruby without Rails
Rails is great for building web apps. But it can be quite overwhelming if you don’t know how web applications work. In this series of articles, we’ll build a simple but complete app in plain Ruby without Rails, to get a deeper understanding and appreciation of everything Rails does for us.

Let's Add Logging to Our No-Rails Ruby WebApp

We'll start with the app.rb script, which is the entrypoint of our application. First, require the logger library and create an instance of logger in the constructor of the App class. Just like Rails, our logger uses a log/development.log file.

💡
The logger won't create a log directory for you, so make sure to create it before running the program.

When the application receives a request, i.e. when the call method is invoked, we'll log a message containing the HTTP request method and the request path.

require 'logger'
require_relative 'config/routes'

class App
  attr_reader :logger

  def initialize
    @logger = Logger.new('log/development.log')
  end

  def call(env)
    logger.info "#{env['REQUEST_METHOD']}: #{env['REQUEST_PATH']}"

    headers = { 'Content-Type' => 'text/html' }

    response_html = router.build_response(env)

    [200, headers, [response_html]]
  end

  private
    def router
      Router.instance
    end
end

Alright... let's try this out!

Launch the application by running either rackup or puma command, and visit the application in the browser. First, visit the home page at / and then visit the /articles/index path.

At this point, you'll find a new development.log file has been created in the log directory, containing the following logs.

# Logfile created on 2023-07-29 16:19:13 -0700 by logger.rb/v1.5.3

I, [2023-07-29T17:54:54.618107 #40911]  INFO -- : GET: /
I, [2023-07-29T17:55:01.643705 #40911]  INFO -- : GET: /articles/index

Our logging system is working as expected. Any time someone visits our application, the logger will make an entry in the log file. You can add as much relevant information as you want in the log.

So that was an info message. What happens when something goes wrong?

To log an error, use the error method on the logger object. Here's the modified call method.

def call(env)
  # existing code ...
rescue => e
  logger.error("Oops, something went wrong. Error: #{e.message}")
  
  # we still have to return a rack-compliant response
  [200, headers, ["Error: #{e.message}"]]
end

I've added a rescue clause that will catch all errors and print the error message to the log file. Finally, we'll return a rack-compliant message containing the error.

To test this, open the ArticlesController class and raise an error from the index action.

require_relative 'application_controller'

class ArticlesController < ApplicationController
  def index
    raise 'Stack Overflow!'
    
    @title = 'All Articles'
  end
end

Now visit the articles/index path, and you'll see the following error message has been appended to the log file.

I, [2023-07-29T18:05:19.979988 #41201]  INFO -- : GET: /articles/index
E, [2023-07-29T18:05:19.980172 #41201] ERROR -- : Oops, something went wrong. Error: Stack Overflow!

Instead of using string interpolation to insert the error message, you can also use the add method on the logger, which lets you pass a string, an error object, or any object.

  • A string: used as-is.
  • An Exception: message.message is used.
  • Anything else: message.inspect is used.
def call(env)
  # existing code ...
rescue => e
  logger.add(Logger::ERROR, e)
  
  # we still have to return a rack-compliant response
  [200, headers, ["Error: #{e.message}"]]
end

This logs the following error message (note the stack trace):

I, [2023-07-30T13:24:38.959108 #48772]  INFO -- : GET: /articles/index
E, [2023-07-30T13:24:38.959283 #48772] ERROR -- : StackOverflow! (RuntimeError)
weby/controllers/articles_controller.rb:5:in `index'
weby/router.rb:30:in `block in get'
weby/router.rb:40:in `build_response'
weby/app.rb:17:in `call'

Congratulations, we've successfully implemented a working logging solution for our application.

That's a wrap. In the upcoming posts, we'll:

  • Implement models just like Rails!
  • Improve the project structure and organization
  • Add unit tests
  • Process form inputs along with query strings into a params object
  • Connect to the database to store and fetch data
  • Add middleware to handle specific tasks like authentication
  • and much more...

If those sound interesting to you, consider subscribing to the blog.


I hope you liked this article and you learned something new. If you're new to the blog, check out the full archive to see all the posts I've written so far or the favorites page for the most popular articles on this blog.

As always, if you have any questions or feedback, didn't understand something, or found a mistake, please leave a comment below or send me an email. I look forward to hearing from you.

If you'd like to receive future articles directly in your email, please subscribe to my blog. If you're already a subscriber, thank you.